How To Podcast in 5 Steps
1. Get The Right Equipment (don’t skip this!)
To begin creating podcasts you will need to invest in some basic equipment. Now I’m not talking HUGE amounts of cash here but you at least need to be ok with spending $50 or so. Of course you can get podcasting for free, but you’re not going to sound great. I guess it goes back to that old adage, “you get what you pay for”.
Microphone – Skip over this section at your own peril
These days you can pick up a decent microphone between the $50 – $100 price range.
The type of microphone that is best for beginners is a “usb microphone”. A usb microphone plugs directly into the usb port of your computer (where your mouse or printer would normally go). And because of it’s simplistic design, a usb microphone doesn’t need a mixer or any sort of external amplifier to make it work!
USB microphones are very easy to use and are also quite portable, so you can take it with you on the go. I’ve recorded episodes in hotel rooms, my bedroom, my parent’s house etc. In fact I’ve even heard of one podcaster who recorded an entire episode sitting on a plane.
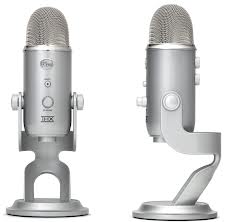
I have tested quite a few usb microphones and I recommend the Blue Yeti.
It is robust, has great quality sound and is very easy to use. And you can get one from Amazon for under $100.
Computer – is yours podcast compatible?
If you have a computer with a sound card that’s a few years old then you can podcast! It doesn’t matter whether it’s a PC or a MAC both will do the job just fine.
And if you’re wondering if your computer does have a sound card, just go to a site like YouTube and play a random video. If you can hear sound then that means you’ve got a sound card!
Software – you’ll love this FREE software
When we record our podcast, our computer is where the audio is being recorded. So to do this properly we need to have some software.
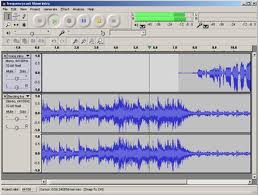
The software I use is called Audacity.
It’s a brilliant bit of software that most podcasters have used (or still use) and produces great sounding podcasts. Most people love it because it is free but is still a bit of a workhorse. But the other reason it’s got so many fans is because it can work on both PC and MAC. It’s really easy to use and can be downloaded from here.
2. What to talk about – you’ll never be stuck for words again…
Once you’ve got all of your equipment and it’s all set up, you’ve then got to decide what to talk about.
Most people who want to podcast already have a blog, so my suggestion to them is to take some of their existing content (blog posts) and then just expand on them or speak them aloud.
If you don’t have a blog or website, then pick a topic that will provide you with plenty of content for future episodes. A strong indicator of a good podcast topic is if you are passionate about it.
For example, my wife loves German shorthaired pointer dogs, so if she started her own podcast about these cute little mutts then it’s unlikely that she’d ever run out of things to say!
Once you know what you’ll talk about, it’ time to research your topic a bit further. Here’s a couple of tools I use to research my episodes:
- Technorati.com (this is a blog search engine, just type in your topic and see all the top blogs on that topic)
- Twitter.com (use the search element in twitter to search keywords for your topic eg. “german short haired pointers”. Then sift through the results to see tweeted articles, interesting on topic re-tweets etc.).
3. Recording
Before you hit record, you need to make sure all the equipment is set up correctly. Here’s a quick check-list…
- Plug the usb microphone into the usb port on your computer
- Open Audacity preferences and select your microphone as the audio input device (this tells the computer where your microphone is)
- Make sure you talk into the right end of the microphone (for the Blue Yeti, this means talking into the side of it!)
- Excellent you are ready to record!
4. Editing – ALWAYS sound awesome!
Once you’ve finished recording your episode, you may want to spend some time editing it. Lucky for you, Audacity is an excellent editor.
Using Audacity to edit will make you sound better than you are
Editing is the process of removing unwanted noises, coughs, splutters, uuums and arghhs.
Just think of Audacity as the audio version of Microsoft word. In Word you can highlight a phrase and cut, copy and paste – you can do the same in Audacity.
The reason most podcasters spend time editing is to make them sound better than they actually are, and you can do the same if you spend some time learning the basics.
By basics I’m talking about cut, copy and paste – oh and delete as well!
Then once you’ve finished editing yourself and you’re happy with how your audio file is sounding, it’s time to export it as an mp3 file. An mp3 file is the file type that will become your podcast.
You can export the file by going to “file” and then select “export as .mp3”.
5. Audio host – Where to put your audio
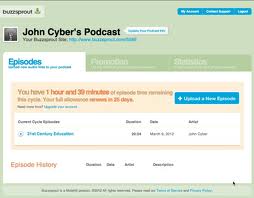
Once you have your final mp3 it’s time to find a suitable audio host. An audio host is a website that you can upload your audio too. They store your audio so when your audience downloads or listen to your episode, it’s from their servers instead of your own (which could be quite expensive). Prices vary for audio hosts, from about $4 per month right up to $22 per month.
You not only pay for the audio hosting but also statistic tracking which I highly recommend. Statistic tracking let’s you see who is listening, from where and when. It let’s you create content for your podcast that you know your audience will love and helps you deliver a better product overall.
Here’s a couple of audio hosts that I use and recommend:
iTunes – Reaching millions of listeners with a simple “click”
The ultimate place you want to get your podcast is in the iTunes store.
Every day millions of people go to iTunes to listen to podcasts and iTunes welcome new podcasts with open arms! It’s free to have your podcast in the iTunes store, all you need to do is to submit your RSS feed on the podcasts page (right sidebar where it says “submit a podcast”). After submission, you should get an email back from iTunes over the next few days that says you have been accepted!
Congratulations you are now a podcaster and in the iTunes store!
Lastly – if you’d some more help on creating a podcast then you can download my FREE podcasting report that shows you how. You can get it by leaving your details in the form below.
[ois skin=”Email Opt-in”]


